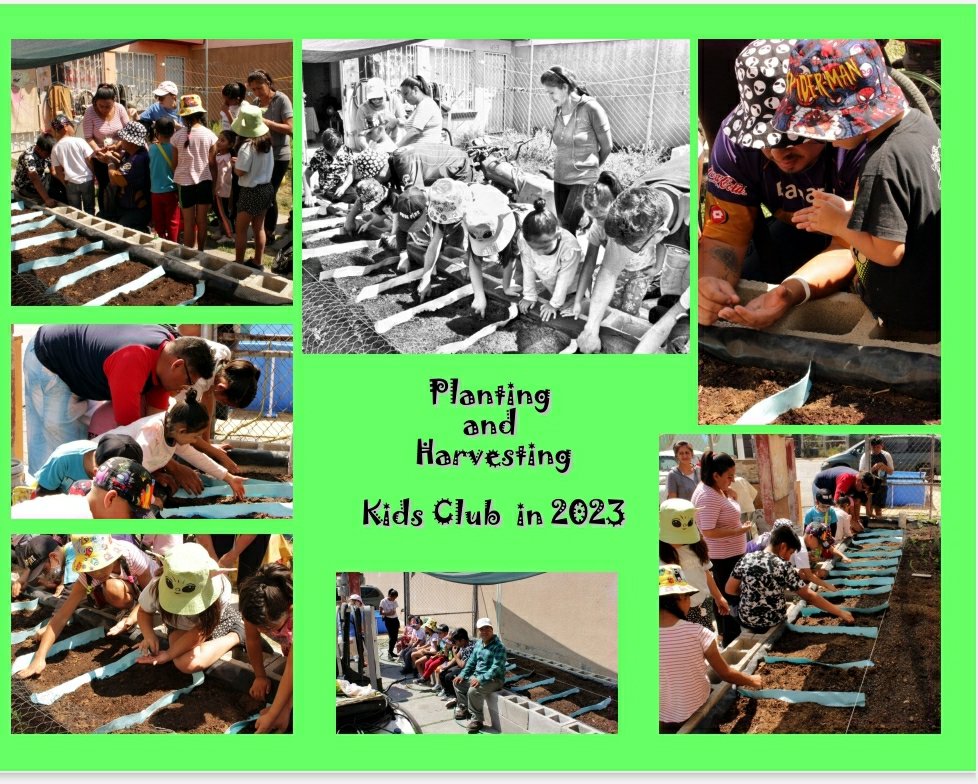
Our friends John and Tracey Pieters sent us this visual summary of what they did near the end of February to get the kids to participate in planting. The activity included a parable taught by Tracey on the 4 soils, a craft, games and a time of water play in a small pool. It was not only a gathering of kids, but the parents too who were able to spend time together.
Mexico City, Mexico
The Sower
He told many stories in the form of parables, such as this one: “Listen! A farmer went out to plant some seeds. As he scattered them across his field, some seeds fell on a footpath, and the birds came and ate them. Other seeds fell on shallow soil with underlying rock. The seeds sprouted quickly because the soil was shallow. But the plants soon wilted under the hot sun, and since they didn’t have deep roots, they died. Other seeds fell among thorns that grew up and choked out the tender plants. Still other seeds fell on fertile soil, and they produced a crop that was thirty, sixty, and even a hundred times as much as had been planted! Anyone with ears to hear should listen and understand.” Matthew 13:3-9 NLT
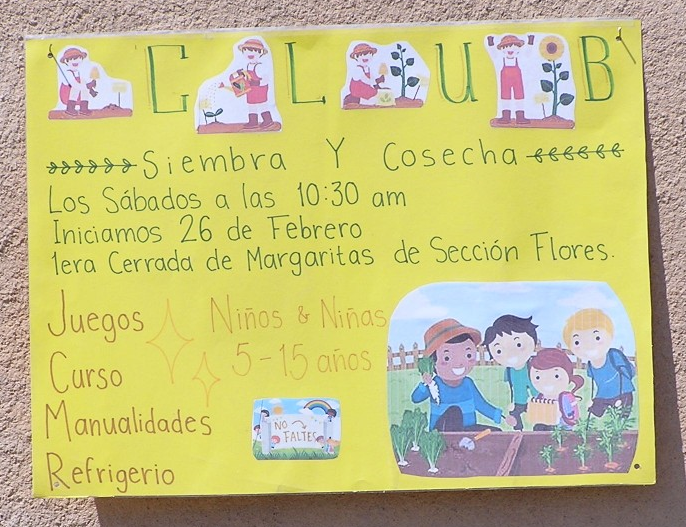
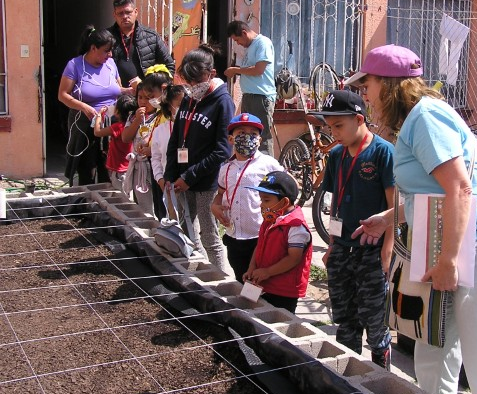
The new neighborhood Kids Club “Siembra y Cosecha” (Sowing and Harvesting), for ages 5 to 15 had its kick-off event on February 26th, 2022. The event offered the children Games (Juegos), Bible Lessons (Curso), Crafts (Manualidades) and Refreshments (Refrigerio). Fourteen children from the neighborhood came to help plant seeds in the new Square Foot Garden wicking bed.
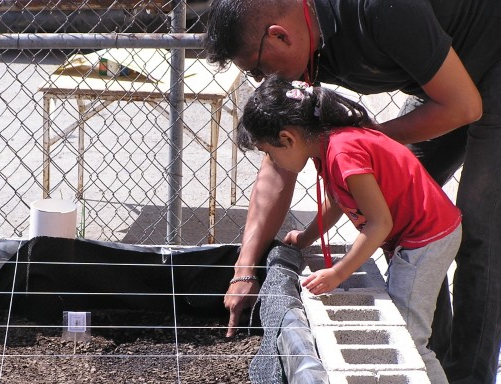
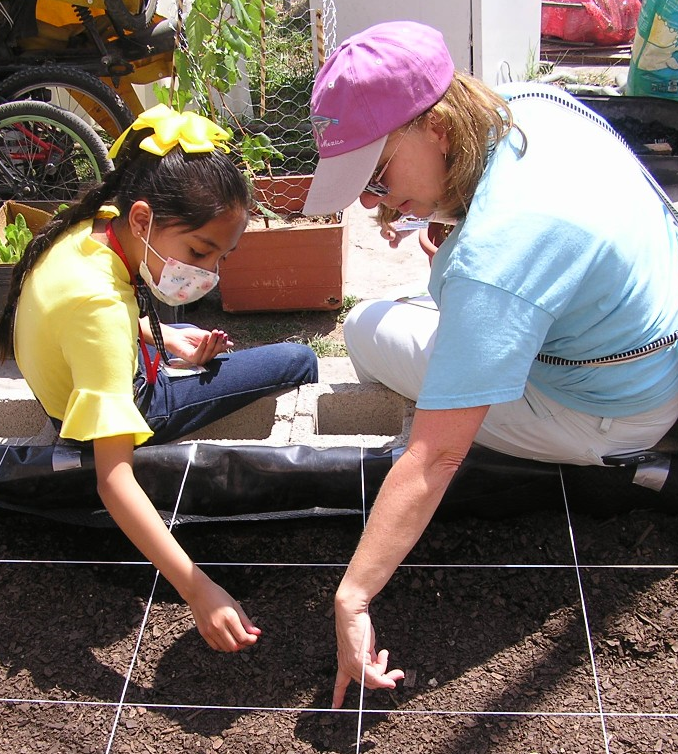
The sign announcing the Kids Club event.The children were excited to learn how to plant vegetables and herbs.A Father shows his daughter where to plant the seed.Tracey helps a girl with planting.
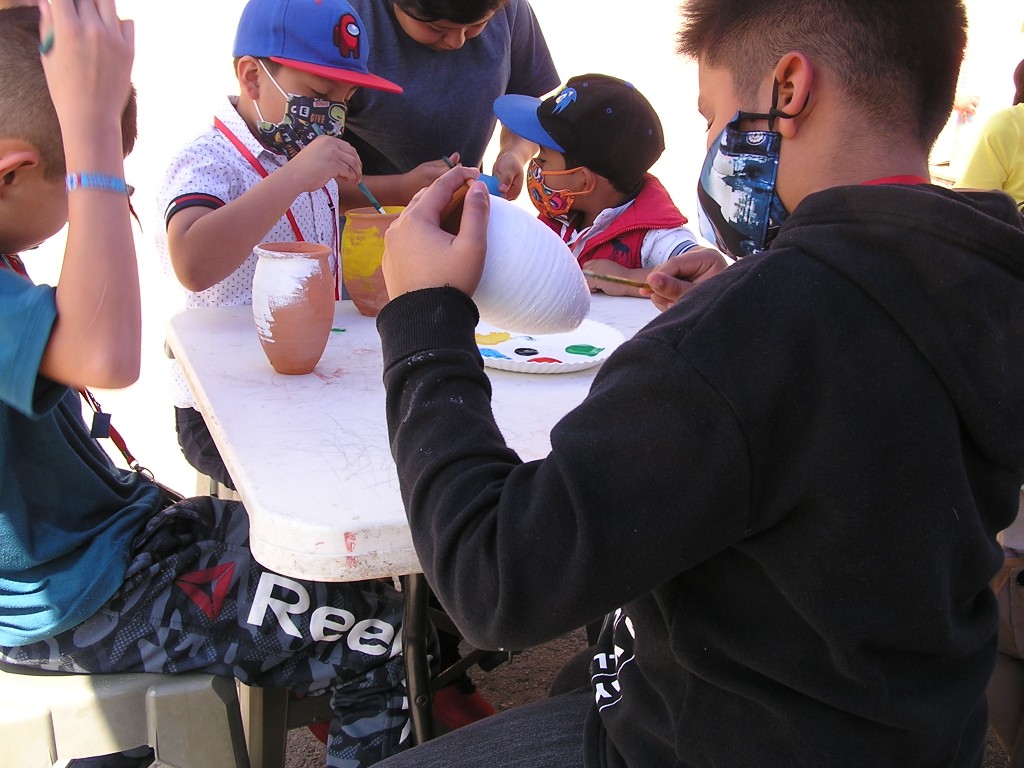
The children painted pots to fill with planting mix and to plant their own seeds to take home and nurture.
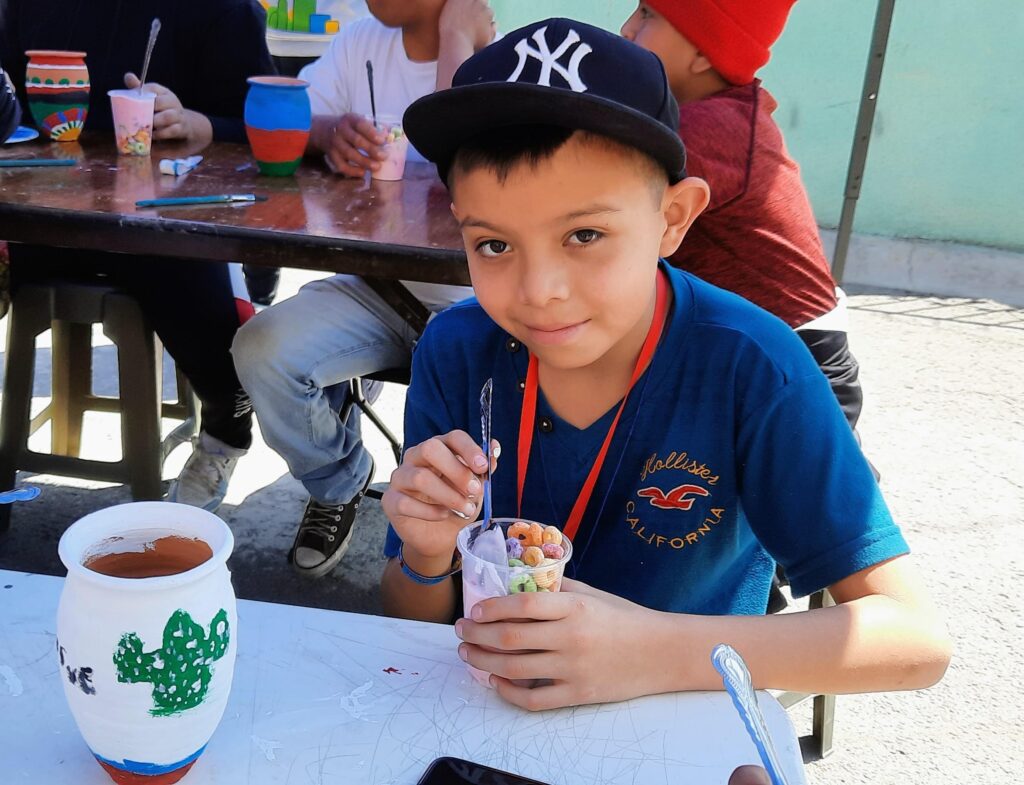
Boy having a snack after painting his pot.
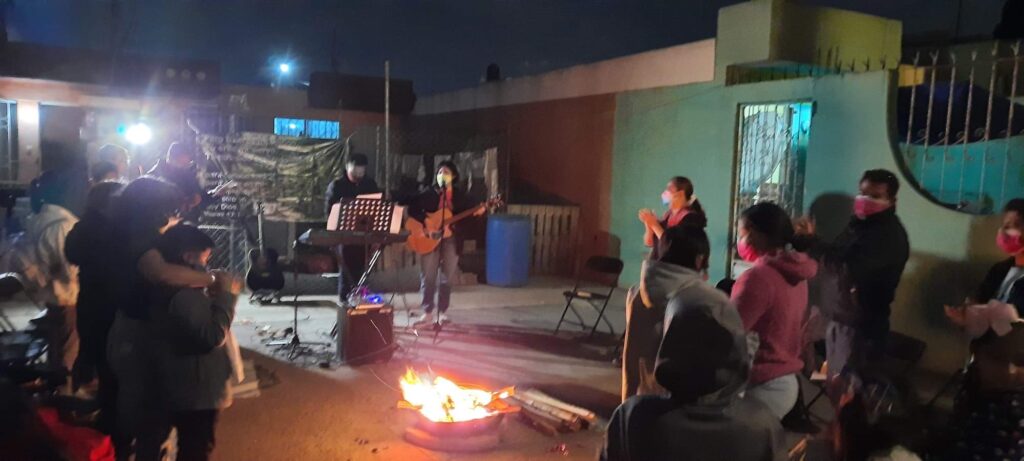
A group of children painting their pots.A special 3-hour prayer meeting was held the night before the planting day.
The Aquaponics House is a Community Garden for the neighbors on this street. The location is used for Sunday Worship services and community outreach. Many of the residents here believe in God but have not taken the steps to live a Christian life. Tracey and John Pieters are living among them, caring for them, and teaching them how to Love the way Jesus loved us!
The Wicking Bed is the first part of a two-phase project to build a Community Garden. The second phase is starting now to build an Aquaponics System on the roof of this house. The system design has been completed but we need additional financial support to purchase the materials and equipment. Please consider contributing to this effort. Follow this link https://uwm.org/missionaries/27334/ to John & Tracey Pieters – United World Mission (uwm.org) or write a check to “United World Mission” and note your preference to “John & Tracey Pieters Account #27334 – Aquaponics”.
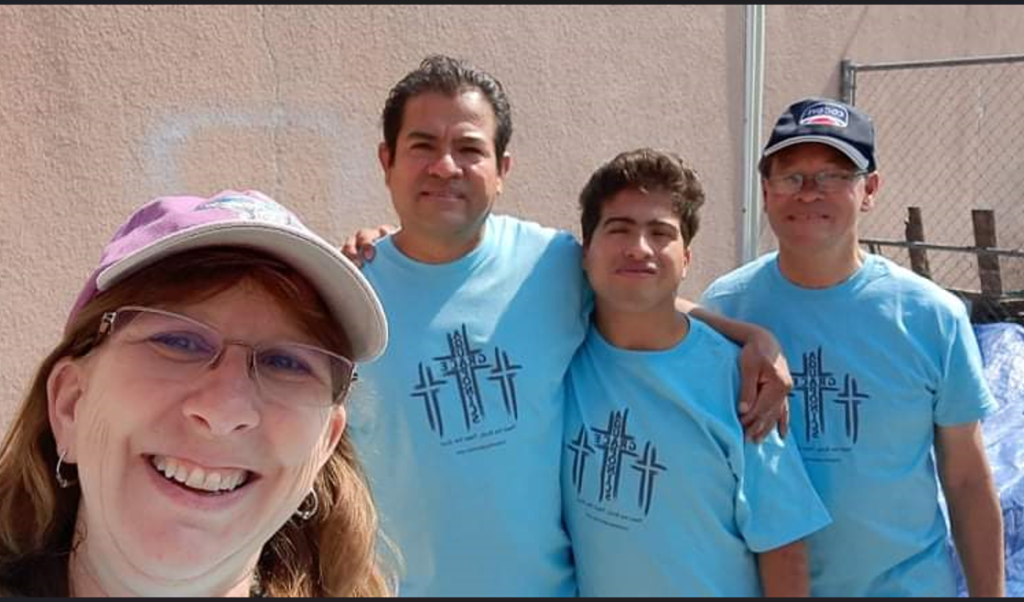
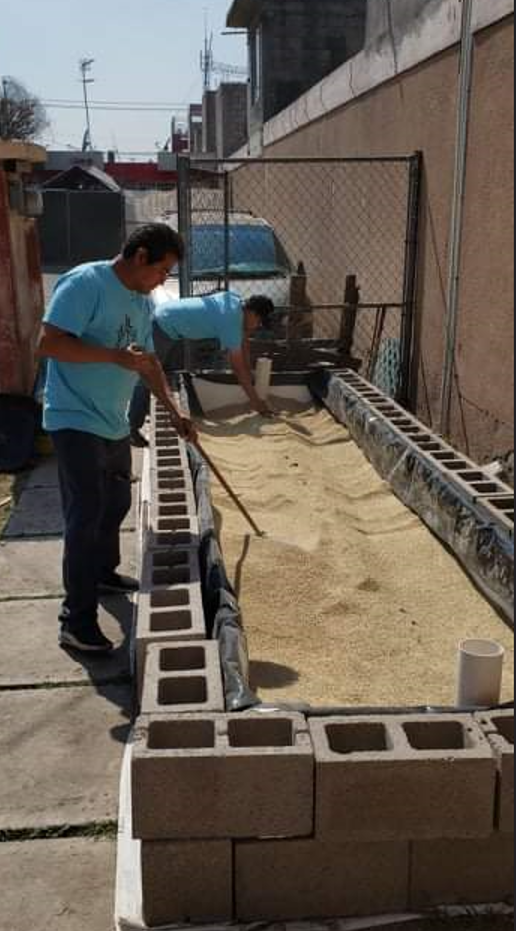
The Mexico City team has the Wicking Bed ready to plant seeds of hope and fresh food in the new community Aquaponics House! Thanks to Tracey, Luis, Jerry, and John. This is the first phase of the system build. (The second phase will be the Aquaponics grow bed and fish tanks on the roof!)
The Mexico City Team: Tracey, Luis, Jerry, and John
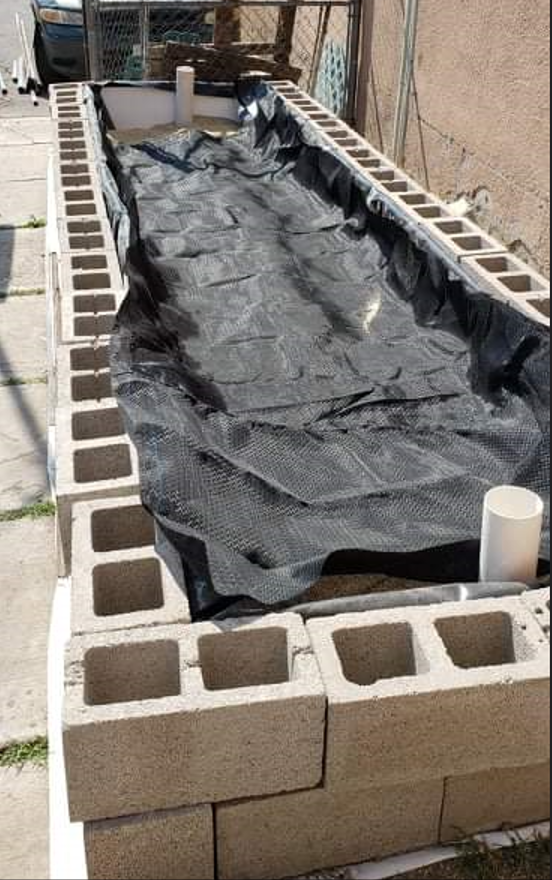
The Wicking Bed is made from standard concrete blocks setup in two rows.
The bed is lined with food safe LDPE plastic, then insulated with 10mm (3/8”) Styrofoam (Polystyrene) on the bottom and sides. The Styrofoam protects the plastic liner and stabilizes the temperature. Water is added to the bed through a 100mm (4″) pipe along the bottom (drilled with holes) that is covered with volcanic rock (Red Tezontle) on both sides. The rock helps improve the water dispersion into the bottom of the bed and stabilizes the pipe.
Luis and Jerry add a 100mm (4″) layer of course horticultural vermiculite to cover the pipe. This creates the water reservoir. There is a 19mm ( ¾”) PVC pipe through the side to allow overflow if the water reservoir gets too full after rain.
A layer of shade cloth or geo textile cloth is placed on top of the vermiculite to keep it separate from the compost.
A 254mm (10”) layer of well-aged compost is added and then topped with a 50mm (2”) layer of straw mulch.
The top edge of the cement blocks will be left open. The excess plastic is tucked inside over the Styrofoam lining. The exposed holes can be filled with planting media and used to grow companion flowers that attract beneficial insects. Another option is to place Trellis posts on the northwest end in these holes for climbing plants like Cucumbers, or beans.
Row covers will be used to protect the plants from heavy rains or cold temperatures during winter.
John and Tracey Pieters are Christian missionaries with United World Mission in Mexico City, Mexico. Their vision is to create a complete Aquaponic System to bring people together, sharing labor, life stories, pure food, and the joy of knowing Jesus Christ.
You may support John & Tracey financially by clicking John & Tracey Pieters – United World Mission (uwm.org) or write a check to “United World Mission” and note your preference to “John & Tracey Pieters Support” (Account #27334).
The fish had not been eating as much and the plants were not growing well. A crop of Butterhead lettuce seedlings all died within two weeks of being rafted. Something was wrong.
Background
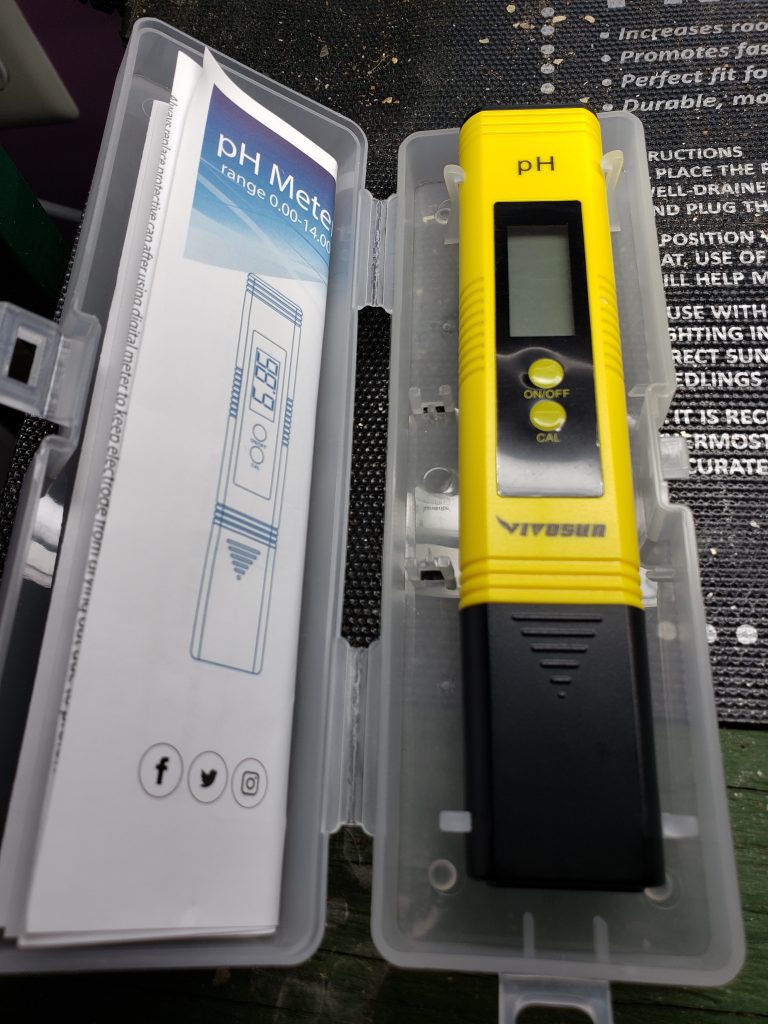
I’ve been operating my backyard 48 square foot deep water culture Aquaponics system for about 4 years now and have never seen these combination of events. The plants had been growing well and the fish active and eating. I had gotten complacent and was not checking water quality regularly. The first test sample revealed a high ammonia level of 4 ppm, and the pH reading was 6.0. It appeared that the nitrification process had stopped working and suspected the pH was lower than 6.0. I realized that 6.0 was the lowest reading either of my test kits could measure so I purchased an electronic meter pen for about $10 that could measure pH from 0 to 14.
pH pen measures from 0 to 14 pH
Yikes! The pH is 4.50! This is too low for my Tilapia, plants, and bacteria. It should be between 6.2 to 6.8.
The Solution
Searching the internet I found an informative article written by Sylvia Bernstein titled “Managing pH in Aquaponic Systems“. In this article she points out that during the life of an Aquaponics system the pH will naturally go down as a result of the nitrification process. She says, “…the nitrogen cycle actually produces nitric acid, which will naturally cause your pH to go down. ” She explains that the hardness of the water “dictates the buffering capacity”. I’ve been keeping a mesh bag full of crushed eggs shells in the system to supplement the calcium, but it has not been enough to offset the production of nitric acid.
Following her advise, I checked the water hardness and found carbonate hardness (KH) was around 5 dKH (or 89.5 ppm) and general hardness (GH) was at about 358 ppm. So the buffering capacity was adequate to raise the pH by adding calcium carbonate and potassium carbonate.
One last check of the pH measured 4.90 (water was 72 degrees F). This system has a total water volume of about 560 gallons. Not wanting to move the pH up too fast I used what was recommended to treat 200 gallons of water. I added 5 teaspoons of each powder into two separate glass pint jars of system water and stirred until dissolved. I slowly poured out the first jar over the air stone at the end of the first trough where the fish tank water flowed into the trough and waited for it to dissipate into the water. Then I slowly poured in the second jar.
The next day (about 16 hours later) the fish tank pH was 6.00 and the troughs were 6.22. Problem solved. I’ll monitor daily and add a little more to move the pH up to around 6.5.
Lessons Learned
Check the water quality at least every three months and keep a log of the results.
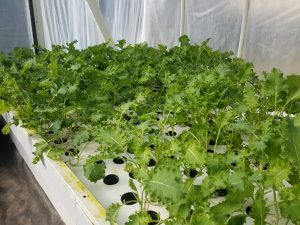
Normally, we harvest the whole plant when it reaches maturity, but I’ve been experimenting with cutting Kale leaves off the plant rather than removing the entire plant. We had a baby Kale salad at a restaurant and it got me to thinking about harvesting Kale while the leaves were small. The young leaves are tender and tasty! So I started cutting the leaves off the plant when they were about the size of my hand. This is working well! The smaller leaves continue to grow and within a few day there is more baby Kale to harvest. There are about 320 Kale plants in my 48 square foot troughs. I’m keeping an eye on the roots and will remove the entire pant when they get too dirty.
Several people have asked for a tour of my greenhouse, so here is a more detailed walk through during my Friday morning harvest. This video is posted on YouTube here:
For the last several months we have been harvesting lettuce on Fridays and taking it out to Tree of Life Ministries in Purcellville , VA. Today I made a brief YouTube video of the Harvest. Today we harvested about 7 pounds of Romaine and Butterhead lettuce. Let me know what else you’d like to see or hear about.
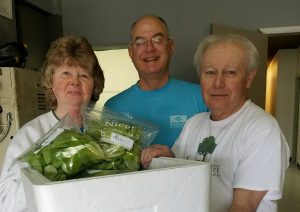
On Friday February 24, 2017 we harvested 11 pounds of Bibb and Butterhead lettuce and gave it to Tree of Life Ministries in Purcellville, VA. The next day it was distributed to 7 families in need of food.


 John and Tracey Pieters are Christian missionaries with United World Mission in Mexico City, Mexico. Their vision is to create a complete Aquaponic System to bring people together, sharing labor, life stories, pure food, and the joy of knowing Jesus Christ.